How to install Woodgrain ABS Edge Banding on curved edges?
Aug 06, 2025
Leave a message
Hey there! As a supplier of Woodgrain ABS Edge Banding, I've had my fair share of experiences with different edge banding projects. Today, I'm gonna walk you through how to install Woodgrain ABS Edge Banding on curved edges. It might sound a bit tricky, but with the right tools and techniques, you'll be able to achieve a professional-looking finish.
Why Choose Woodgrain ABS Edge Banding?
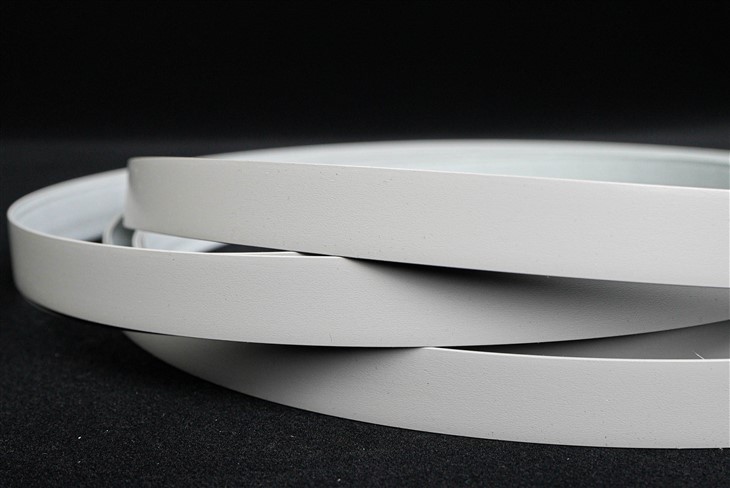
First off, let me tell you why Woodgrain ABS Edge Banding is a great choice. ABS (Acrylonitrile Butadiene Styrene) is a durable and versatile plastic material. It's resistant to scratches, chemicals, and impacts, making it suitable for a wide range of applications. The woodgrain finish gives it a natural and warm look, adding a touch of elegance to your furniture or cabinetry.
We offer a variety of woodgrain patterns and colors to match different design styles. For example, you can check out U732 ST9 Dust Grey CT10016M EA16259, H1176 ST37 White Halifax Oak CT10021M EA16264, and BLANCO COLONIAL PE CT50016M EA16351. These are just a few of our popular options, and you're sure to find the perfect match for your project.
Tools and Materials You'll Need
Before you start the installation process, gather the following tools and materials:
- Woodgrain ABS Edge Banding: Choose the right width and thickness for your project. Make sure to measure the curved edge accurately to determine the length you need.
- Adhesive: There are different types of adhesives available, such as hot melt glue, contact cement, and double-sided tape. The choice of adhesive depends on the specific application and the surface you're working on.
- Curved Edge Former: This tool helps you shape the edge banding to fit the curved edge. You can find curved edge formers in different radii to match your specific curve.
- Router: A router with a suitable bit is used to trim the excess edge banding and create a smooth finish.
- Sandpaper: Use sandpaper to smooth the edges and blend the edge banding with the surface.
- Clamps: Clamps are used to hold the edge banding in place while the adhesive dries.
- Utility Knife: A utility knife is used to cut the edge banding to the desired length and make any necessary adjustments.
Step-by-Step Installation Process
Step 1: Prepare the Surface
The first step is to prepare the surface of the curved edge. Make sure it's clean, dry, and free of any dust, dirt, or debris. You can use a damp cloth to wipe the surface and let it dry completely. If the surface has any rough spots or imperfections, sand them down to create a smooth and even surface.
Step 2: Measure and Cut the Edge Banding
Measure the length of the curved edge and add a few extra inches to allow for trimming. Use a utility knife to cut the edge banding to the desired length. Make sure to cut it straight and at a 90-degree angle.
Step 3: Apply the Adhesive
Depending on the type of adhesive you're using, apply it to either the back of the edge banding or the surface of the curved edge. If you're using hot melt glue, use a glue gun to apply a thin and even layer of glue to the edge banding. If you're using contact cement, apply it to both the edge banding and the surface and let it dry for a few minutes until it becomes tacky.
Step 4: Shape the Edge Banding
Place the edge banding on the curved edge former and shape it to fit the curve. Make sure to apply even pressure to ensure a smooth and consistent curve. You may need to use a heat gun to soften the edge banding slightly to make it more flexible and easier to shape.

Step 5: Apply the Edge Banding
Carefully place the shaped edge banding on the curved edge, starting from one end and working your way to the other. Make sure to align the edge banding with the edge of the surface and press it firmly into place. Use a roller or a cloth to apply even pressure and remove any air bubbles.
Step 6: Trim the Excess Edge Banding
Once the edge banding is in place, use a router with a suitable bit to trim the excess edge banding. Make sure to follow the curve of the edge and keep the router at a consistent angle. You can also use a utility knife to make any final adjustments and trim any remaining excess.
Step 7: Sand the Edges
Use sandpaper to smooth the edges of the edge banding and blend it with the surface. Start with a coarse grit sandpaper and gradually work your way to a finer grit for a smooth and professional finish. Make sure to sand in the direction of the grain to avoid scratching the surface.
Step 8: Let the Adhesive Dry
Allow the adhesive to dry completely according to the manufacturer's instructions. This may take a few hours or overnight, depending on the type of adhesive you're using. Avoid touching or moving the edge banding until the adhesive is fully dry.
Tips and Tricks
- Practice on a scrap piece of material first to get a feel for the installation process and to test the tools and techniques.
- Make sure to wear protective gear, such as gloves and safety glasses, when using tools and adhesives.
- Use a heat gun carefully to avoid overheating the edge banding and causing it to melt or deform.
- If you're having trouble shaping the edge banding, try using a smaller radius curved edge former or applying more heat to make it more flexible.
- When trimming the excess edge banding, take your time and make small, precise cuts to avoid damaging the edge banding or the surface.
Conclusion
Installing Woodgrain ABS Edge Banding on curved edges may seem like a challenging task, but with the right tools, materials, and techniques, it can be a rewarding and satisfying project. By following the steps outlined in this blog post and using the tips and tricks provided, you'll be able to achieve a professional-looking finish that will enhance the appearance and durability of your furniture or cabinetry.
If you're interested in purchasing Woodgrain ABS Edge Banding for your next project, feel free to reach out to us. We'd be happy to help you choose the right product and provide you with any additional information or support you may need. Contact us today to start your edge banding project!
References
- "Edge Banding Installation Guide." Woodworking Magazine.
- "How to Install ABS Edge Banding." DIY Furniture Blog.
- "Tips for Working with Curved Edges." Home Improvement Journal.